
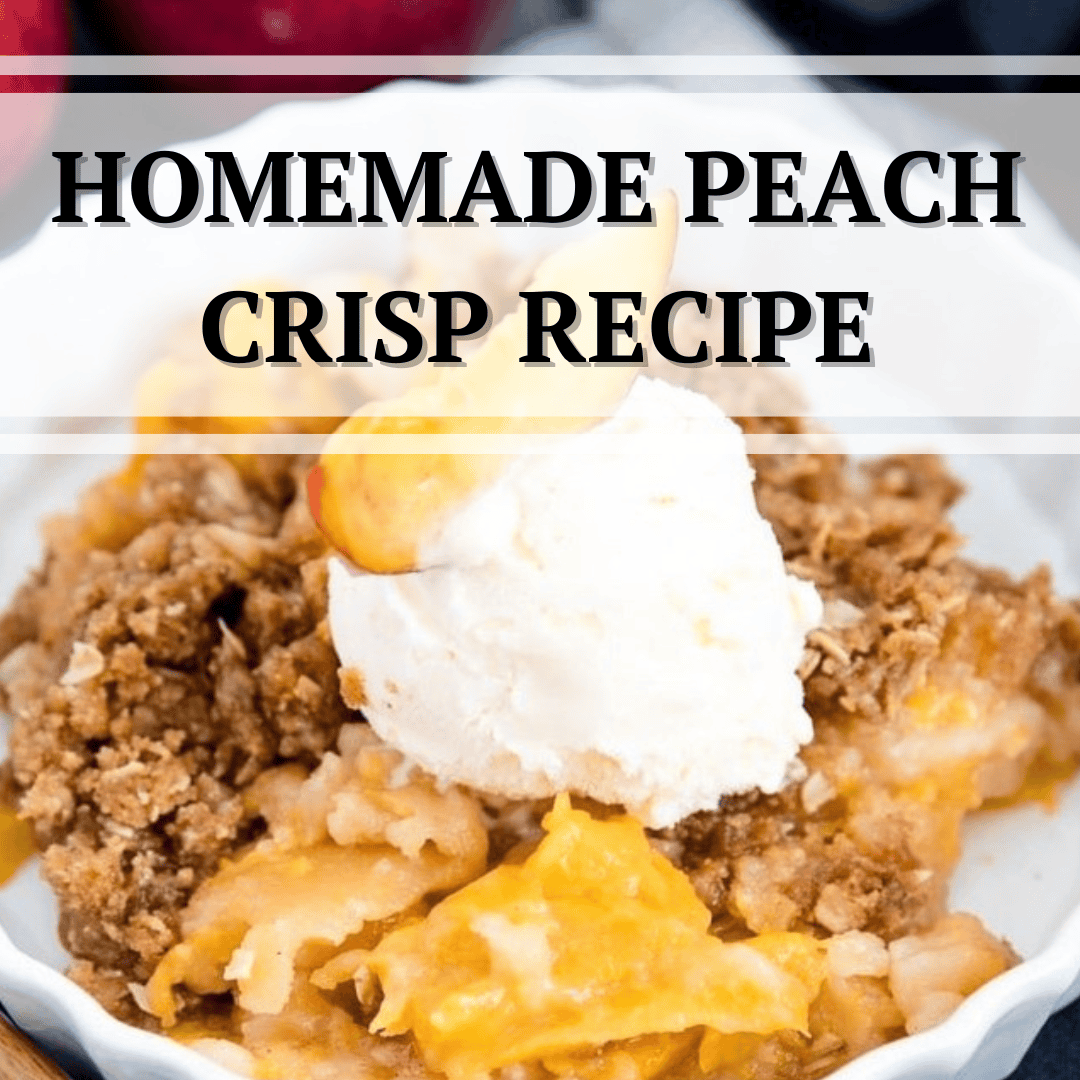
If you’ve ever wanted a dessert that feels like summer in a spoon, this peach crisp delivers. It’s simple, comforting, and bursting with the flavor of ripe, juicy peaches.
The fruit bubbles underneath a buttery oat topping that’s crisp at the edges and slightly chewy in the center.
What makes this dessert so inviting is how effortlessly it comes together — no rolling dough or chilling pastry.
Just toss the peaches in sugar and lemon juice, mix up the crumble, and bake until everything smells like sunshine. It’s the kind of dessert you’ll want to make all season long.
Fresh, Canned, or Frozen Peaches: Which Is Best?

Fresh Peaches
Fresh, ripe peaches are the ideal choice for a peach crisp. They offer the best texture and flavor—sweet, juicy, and naturally fragrant. Look for peaches that give slightly when pressed and have a bright, fruity aroma.
Canned Peaches
You can absolutely make peach crisp with canned peaches if fresh ones aren’t in season. Just make sure to drain them well before using. Skip any heavy syrup — peaches canned in juice work best.
Frozen Peaches
Frozen peaches are another great option. Thaw them completely and drain off excess liquid before baking. They’re convenient and usually picked at peak ripeness, so you’ll still get good flavor.
This recipe specifically uses fresh peaches, but that doesn’t mean you can’t use canned or frozen ones.
Tips for the Best Peach Crisp
Peel the Peaches (Optional but Recommended)
The skin can sometimes toughen during baking. For a smoother filling, blanch the peaches in boiling water for 30 seconds, then slip off the skins easily.
Balance the Sweetness
Taste your peaches before adding sugar. If they’re very sweet, use a little less. For slightly tart peaches, add a tablespoon or two more sugar. If you’re cutting back on sugar, substitute it with honey or stevia instead.

Don’t Overbake
You want the topping golden and crisp, not dry. Once the peach juices bubble up around the edges, it’s ready.
Serve Warm
The crisp is best enjoyed warm, when the topping is crunchy and the filling is bubbling.
Recipe Variations and Substitutes
This peach crisp is endlessly adaptable, so you can tailor it to your taste or pantry.
For a little extra spice, add ground cinnamon or nutmeg to the oat topping. Chopped pecans or almonds add crunch, while a handful of shredded coconut makes the topping richer and more fragrant.

If you’d like to make it gluten-free, use certified gluten-free oats and substitute almond flour or a gluten-free baking blend for the all-purpose flour.
Dairy-free? Coconut oil or vegan butter works just as well as regular butter.
Some bakers even stir a splash of bourbon or rum into the peach filling for depth and warmth — it’s optional, but undeniably delicious.
Make Ahead and Freezing Instructions
Peach crisp can easily be made in advance, making it perfect for gatherings or meal prep.
You can assemble the crisp up to 24 hours ahead of time and store it in the refrigerator before baking. When ready, bake straight from the fridge, adding a few extra minutes to the bake time if needed.
To freeze, assemble the unbaked crisp in a freezer-safe dish, cover tightly, and freeze for up to three months. When you’re ready to bake, thaw overnight in the fridge and bake as directed.
If you’ve already baked it, allow the crisp to cool completely, then cover tightly and freeze. Reheat it in a 350°F (175°C) oven until warmed through and crisp again.
How to Store Peach Crisp
Once baked, let your peach crisp cool completely before covering. At room temperature, it stays fresh for about two days. In the refrigerator, it will keep for up to five days.
To reheat, warm individual portions in the microwave for a quick fix, or refresh the topping in the oven for about 10–15 minutes at 325°F (160°C).
Serving Suggestions

Warm peach crisp practically begs for a scoop of vanilla ice cream—the cream melts into the syrupy peaches and crisp topping, creating the ultimate contrast of hot and cold.
If you prefer something lighter, a dollop of whipped cream or a drizzle of vanilla yogurt works beautifully. For a breakfast twist, serve leftovers with Greek yogurt and a sprinkle of cinnamon.
Frequently Asked Questions
Can I make peach crisp without oats?
Yes, you can replace the oats with extra flour and chopped nuts for a more crumbly topping. It’ll be closer to a peach crumble but still delicious.
Can I leave the skins on my peaches?
You can, though the texture will be slightly chewier. If you’re short on time, leaving the skins on won’t ruin the dessert.
Can I use other fruits with peaches?
Absolutely. Try combining peaches with blueberries, raspberries, or even sliced apples. The mix of tart and sweet fruit gives the dessert more depth.
Can I make this recipe ahead of time?
Yes, you can assemble it the day before and bake when ready. It also reheats beautifully, making it perfect for entertaining.
Homemade Peach Crisp with Fresh Peaches and Buttery Oats
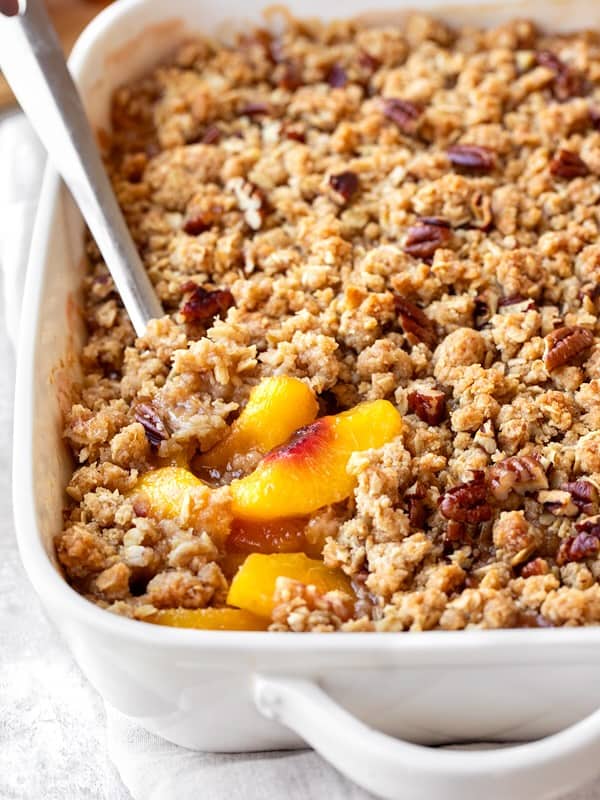
Image credit: @thecozyapron
Ingredients
For the Filling
- 6–7 fresh peaches (about 6 cups), peeled and sliced
- 1/3 cup granulated sugar
- 1 tablespoon lemon juice
- 1 tablespoon cornstarch
- 1 teaspoon vanilla extract
For the Crisp Topping
- 3/4 cup all-purpose flour
- 3/4 cup old-fashioned oats
- 1/2 cup light brown sugar
- 1/2 teaspoon ground cinnamon
- 1/4 teaspoon salt
- 1/2 cup unsalted butter, melted
Instructions
- Preheat and prepare the dish. Preheat your oven to 350°F (175°C). Grease a 9x9-inch baking dish or similar-sized ovenproof dish.
- Make the filling. In a large bowl, toss the peaches with sugar, lemon juice, cornstarch, and vanilla until evenly coated. Spread the mixture into the prepared baking dish.
- Mix the topping. In another bowl, stir together the flour, oats, brown sugar, cinnamon, and salt. Add the melted butter and mix until the mixture resembles coarse crumbs.
- Assemble the crisp. Sprinkle the oat mixture evenly over the peaches.
- Bake. Bake for 35–40 minutes, or until the topping is golden and the filling is bubbling.
- Cool and serve. Let it rest for about 10 minutes before serving. Serve warm with ice cream or whipped cream.
Featured image credit: @yellowblissroad